New flooring is one of the most impactful renovations a Bay Area homeowner can make. It touches every room you walk through, sets the tone for the rest of the design, and — done well — quietly lasts 20 years or more. Done badly, it telegraphs every shortcut: cupping, gapping, hollow sounds underfoot, grout cracks where the subfloor flexes. This guide walks through everything Bay Area homeowners should know about flooring installation: how to choose between hardwood, LVP, tile, and stone; what the project actually costs in 2026 dollars; how the schedule runs; the substrate work most homeowners don’t think about; and the mistakes that turn a fresh floor into a callback. Practical, not flashy — flooring rewards getting the boring stuff right.
Overview: What Flooring Installation Actually Involves
The visible part of a flooring project is the floor that arrives at the end. The invisible parts — the demo, the subfloor prep, the moisture mitigation, the acclimation, the underlayment — are what determine whether the floor lasts.
A typical Bay Area flooring project includes:
- Demo of the existing floor (and disposal)
- Subfloor inspection, leveling, and repair
- Moisture testing (especially over concrete slabs)
- Underlayment install if applicable
- Material acclimation (24 to 72 hours minimum for wood)
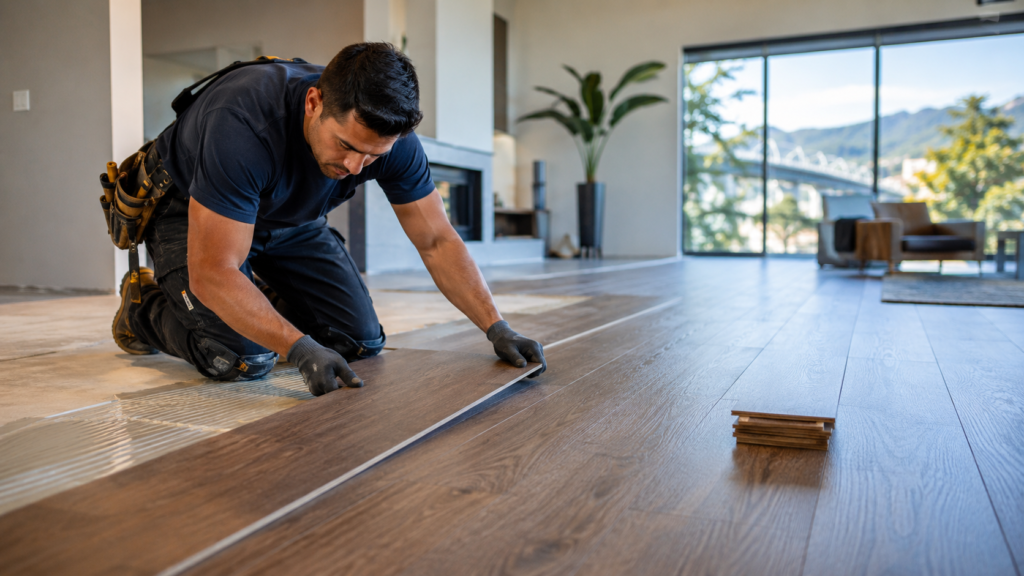
- Installation
- Transitions, trim, and finishing
- Cleanup and final walkthrough
What’s missing from many bargain flooring proposals: subfloor leveling, moisture mitigation, and proper transitions. These are the steps that take time and add cost, and they’re the steps that decide whether the floor cups, gaps, squeaks, or fails in the first three to five years. In our experience, the difference between a $7-per-square-foot install and a $14-per-square-foot install is usually subfloor work, not the floor material itself.
How to Think About Flooring in a Bay Area Home
A few realities of Bay Area homes that shape every flooring decision:
Slab vs. raised foundation. A meaningful share of Bay Area homes — particularly newer construction and many condos — sit on concrete slabs. Slab installations require moisture testing and often a vapor barrier or moisture mitigation product. Raised-foundation homes (most older East Bay and Peninsula homes) have a crawl space and a different set of considerations — subfloor type, joist spacing, ventilation underneath.
Climate variation. Coastal Bay Area homes (Pacifica, Half Moon Bay, parts of San Francisco) sit in a humidity range that affects wood floors differently than inland heat (Walnut Creek, Pleasanton, Tri-Valley). Material choices and acclimation should reflect the actual climate of the home.
Existing flooring conditions. A Bay Area 1950s ranch in Castro Valley likely has original hardwood under decades of carpet, sometimes salvageable, sometimes not. A 1980s tract home in Dublin probably has glued-down vinyl or carpet over particleboard. A new build in Mountain View has engineered hardwood or LVP over OSB or plywood. Each of these has a different starting condition and a different right approach.
Allergens and family use. Hardwood and tile are easier to keep allergen-free than carpet. LVP is essentially impermeable. For families with pets, kids, or allergies, the choice usually pushes toward hard surfaces.
Key Decisions You’ll Make in a Flooring Project
A few decisions set the project up. Get them right and the rest tends to follow.
Material Choice
Each material has a sweet spot:
- Solid hardwood — premium look, sandable and refinishable, lasts 50+ years with care. Best for living areas and bedrooms over raised foundations. Not ideal for bathrooms, basements, or wet areas.
- Engineered hardwood — real wood top layer over plywood substrate. More dimensionally stable than solid wood. Can go over concrete slabs. Refinishable 1 to 3 times depending on wear layer thickness.
- Luxury vinyl plank (LVP) — waterproof, scratch-resistant, dimensionally stable. Works in kitchens, baths, basements, anywhere wet. Modern LVP visuals are excellent — the giveaway is that all the planks look identical.
- Tile (porcelain or ceramic) — extremely durable, waterproof, ideal for bathrooms, kitchens, mudrooms, and high-traffic entries. Hard underfoot, cold without heat. Best for ground-floor installations.
- Natural stone — beautiful, character-rich, requires sealing and care. Marble and travertine are sensitive to acidic cleaners; granite and slate are more forgiving. Premium pricing.
- Carpet — still appropriate for bedrooms, stairs, and basement family rooms. Easier on feet and quieter. Modern stain-resistant fibers hold up to family use.
Most Bay Area homes today end up with a mix: hardwood or engineered in main living areas, LVP or tile in kitchens and baths, possibly carpet in bedrooms and stairs. Learn more on choosing the right flooring for each room walks through this in more depth.
Solid Vs. Engineered Hardwood
The most common confusion. Solid hardwood is a single piece of wood through and through; engineered hardwood has a wood veneer over a plywood substrate. Both are real wood on the surface.
Engineered is more dimensionally stable, can go over concrete slabs, handles humidity changes better, and is the smart choice for Bay Area homes on slabs or in coastal humidity. Solid is more refinishable, ages with more character, and is the traditional choice for older raised-foundation homes.
The “engineered = inferior” instinct is dated. Modern engineered hardwood with a 4mm to 6mm wear layer is essentially indistinguishable from solid in look and feel, more stable, and often the right choice.
Width and Plank Length
Wider planks (6 to 9 inches) look more current and read more spacious. Narrower planks (2 to 4 inches) read more traditional and tend to age slightly less gracefully (more seams to telegraph). Longer planks (6 feet+) read premium; short pieces read budget. Width and length affect price meaningfully — a wide, long plank is harder to mill consistently and costs more.
Finish in Place Vs. Pre-Finished
Site-finished hardwood is sanded and stained after installation. The result is a continuous, seam-sealed finish that hides plank edges. Pre-finished arrives sealed from the factory, faster to install, but has visible micro-bevels between planks (where dust collects).
For a custom look and a tighter floor, site-finished wins. For speed, convenience, and harder factory finishes, pre-finished wins. Both produce excellent results when done well.
Direction and Pattern
Run hardwood perpendicular to the longest wall of the room — usually parallel to the joists. Herringbone, chevron, and parquet patterns dramatically change the room’s character but add labor cost and waste material. A traditional straight-lay floor reads quietly elegant; a chevron pattern reads like a statement.
Cost Overview: 2026 Bay Area Flooring Prices
Realistic 2026 Bay Area installed prices per square foot for a typical project (excludes subfloor major repair):
- Carpet (mid-range): $5 to $10
- Luxury vinyl plank (LVP): $7 to $14
- Laminate: $5 to $10 (used less in Bay Area than nationally)
- Engineered hardwood (mid-range): $11 to $20
- Engineered hardwood (premium): $20 to $35
- Solid hardwood (oak, maple): $14 to $25
- Solid hardwood (premium species like walnut, white oak wide-plank): $25 to $45+
- Porcelain tile (mid-range): $10 to $20
- Porcelain tile (premium imported, large format): $25 to $50
- Natural stone (marble, travertine, slate): $25 to $80+
What drives the price up: subfloor repair (cupped or out-of-level subfloors can add $2 to $6 per square foot), moisture mitigation over slabs ($1.50 to $4 per square foot), demo of glued-down or stapled existing flooring, intricate patterns (herringbone, chevron, mixed-material), and stair installations (often $90 to $180 per step).
What keeps the budget reasonable: a flat, dry subfloor; common widths and standard patterns; less expensive species (red oak, maple) over premium ones; and a single material spanning multiple rooms.
For more, see our blog on Bay Area flooring costs.
Process and Timeline Overview
A typical 1,500-square-foot Bay Area flooring replacement runs about 10 to 18 days from demo to move-back-in, plus material lead time.
Pre-installation (1 to 6 weeks) — material selection, ordering, lead time (in-stock LVP can ship in days; specialty hardwood can take 6 to 14 weeks).
Acclimation (24 to 72 hours) — hardwood and engineered should sit in the home in unsealed boxes near final temperature and humidity before installation. Skipping this step is the most common cause of post-install cupping and gapping.
Demo (1 to 3 days) — old flooring removed, debris disposed. Glued vinyl and stapled carpet take longer than floating laminate.
Subfloor prep (1 to 4 days) — leveling compound where needed, plywood repair, moisture mitigation if applicable, underlayment install.
Installation (3 to 10 days) — depending on square footage, complexity, and material.
Transitions and finishing (1 to 2 days) — thresholds at room transitions, baseboard, quarter-round shoe molding, any trim touch-ups.
Settle period (1 to 7 days) — for site-finished floors, the finish cures during this period. Furniture and rugs go back gradually.
For the full week-by-week walk-through, see the blog on flooring installation timeline.
Common Flooring Installation Mistakes Bay Area Homeowners Make
Skipping acclimation. Hardwood needs to acclimate to the home’s humidity before install. Skipped acclimation is the cause of most cupping, gapping, and complaints in the first six months.
Not testing for moisture over concrete slabs. Concrete that looks dry can have meaningful moisture vapor moving through it. Calcium chloride or relative humidity testing before install is non-negotiable for wood or LVP over slab.
Choosing the cheapest installer. Flooring labor isn’t the place to save. A bargain installer who skips substrate prep produces a floor that looks fine for six months and fails by year two. Quality installation labor in the Bay Area runs $3 to $8 per square foot above material cost, and it’s worth every dollar.
Underestimating subfloor work. Old Bay Area homes often have uneven, squeaky, or partially water-damaged subfloors. The flooring proposal that doesn’t include subfloor work is the one that produces problems.
Wrong material for the room. Solid hardwood in a basement bath. LVP under a refrigerator that leaks. Ceramic in a freezing garage. Each material has a use case, and using it outside that use case is asking for failure.
Common Questions About Flooring Installation in the Bay Area
How Long Does Hardwood Floor Installation Take in a Typical Home?
For a 1,500-square-foot Bay Area home with engineered or solid hardwood, plan on 6 to 12 days of actual installation work, plus 2 to 4 days for demo and subfloor prep, plus acclimation time. For site-finished floors, add another 3 to 5 days for sanding, staining, and finishing.
Do I Need to Move Out During a Flooring Install?
For a whole-house project, usually yes — at least during the install days. Furniture has to be moved out of the work area, dust is significant during sanding, and the finish cure period needs some hours undisturbed. For room-by-room installs, often you can stay.
Can I Install Hardwood Over Tile?
Yes, in some cases — engineered hardwood can be glued or floated over tile if the tile is in good condition, flat, and the resulting floor height won’t create transition or door-clearance problems. Solid hardwood usually can’t.
What’s the Right Flooring for a Bay Area Home With Pets?
LVP and tile are the easiest. Engineered hardwood with a good wear layer handles pet traffic well; solid hardwood scratches more easily and shows it. Carpet — modern stain-resistant types — works in bedrooms but not in main pet living areas.
Should I Refinish Existing Hardwood or Replace It?
If the existing hardwood is 3/4-inch solid and has been sanded fewer than 3 times, refinishing is usually the better value — $4 to $8 per square foot in the Bay Area vs. $14 to $25+ for new install. If the wood is thin, water-damaged in multiple spots, or has structural issues, replacement makes more sense.
How Top Tier Approaches Flooring
Top Tier handles flooring projects across the Bay Area, from a single-room hardwood install to whole-house engineered hardwood, LVP, and tile combinations. The team starts with substrate inspection before any selection conversation — because the substrate determines what’s possible. Moisture testing on slabs, level checks on raised foundations, joist inspection in older homes. Licensed under CA License #1146790, bonded and insured. For larger projects involving flooring alongside other trades, project management coordinates flooring with the rest of the schedule; for premium projects involving natural stone, stone polishing and restoration is handled in-house.
If you’re planning a Bay Area flooring project and want to think through material and approach with someone who’s installed thousands of square feet across every kind of Bay Area home, a short conversation usually gets you specific guidance for your home.
By Top Tier Building Services Inc.
Licensed Bay Area General Contractor License #1146790 serving homeowners, HOAs, and property managers from Castro Valley. Top Tier delivers design-build, renovation, and maintenance services across 14 specialty trades.