
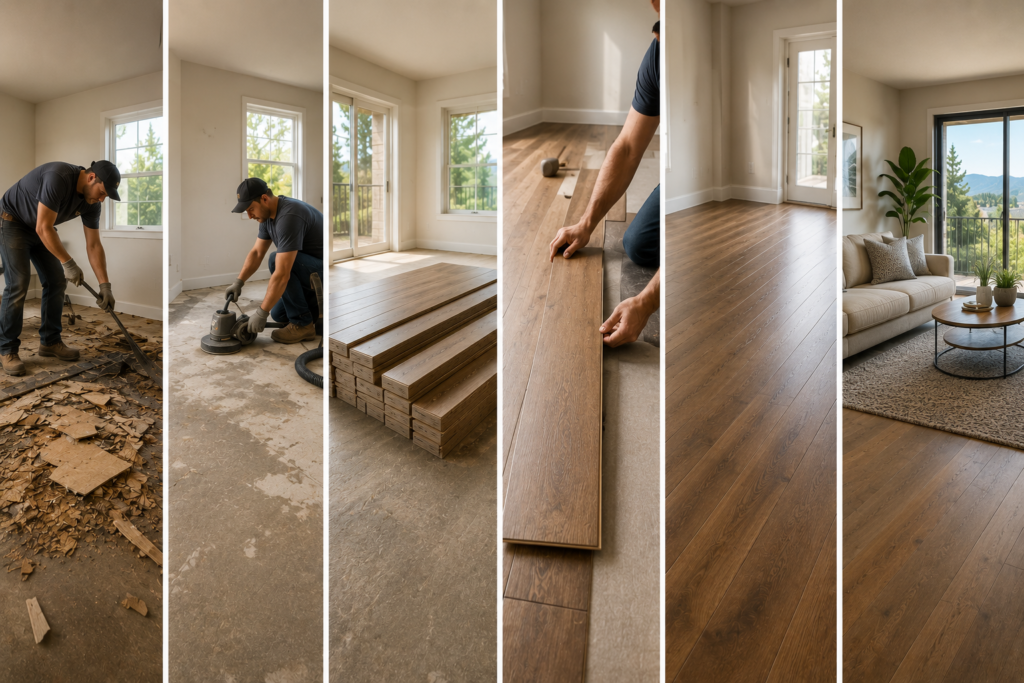
A typical Bay Area flooring installation runs 10 to 18 days from demo to move-back-in, plus material lead time of anywhere from 1 to 14 weeks before that. The on-site work is shorter than most major renovations, but it’s tightly sequenced — substrate prep, acclimation, install, and finishing each have to happen in order, and rushing any step is what causes a floor to fail in year three. This timeline walks through what to expect day by day for a typical Bay Area flooring project. For the broader picture, see the complete Bay Area flooring installation guide.
The Short Answer
For a 1,500-square-foot Bay Area whole-house flooring project in 2026 (engineered hardwood or premium LVP):
- Pre-installation (material lead and acclimation): 1 to 14 weeks
- Demo of existing flooring: 1 to 3 days
- Subfloor prep and leveling: 1 to 3 days
- Underlayment and moisture mitigation (if applicable): 1 day
- Installation: 3 to 10 days
- Transitions, baseboard, trim: 1 to 2 days
- Cleanup and walkthrough: 1 day
- Finish cure (site-finished hardwood only): 3 to 7 days
Total on-site: about 10 to 18 days, with another 1 to 2 weeks before furniture and rugs go back if the floor is site-finished.
Pre-Installation: Material Lead Time and Acclimation
The schedule starts before anyone shows up at the house.
Material Lead Time
Lead times in 2026 Bay Area pricing:
- In-stock LVP at a big box: 3 to 7 days
- Specialty LVP: 2 to 6 weeks
- Standard hardwood (red oak, maple in common widths): 1 to 3 weeks
- Wide-plank or premium hardwood (white oak, walnut, hickory): 4 to 10 weeks
- Custom-milled or imported hardwood: 8 to 16 weeks
- Tile (in-stock domestic): 1 to 3 weeks
- Imported tile: 4 to 12 weeks
- Natural stone slabs: 4 to 16 weeks
The installation schedule can’t start until material is delivered. A bargain material that takes 10 weeks to arrive isn’t actually a deal if the homeowner is living on subfloors for a month longer than expected.
Acclimation
Hardwood — solid and engineered — needs to acclimate to the home’s temperature and humidity before installation. The boxes get unstacked into the install area for 24 to 72 hours minimum (some manufacturers require 7+ days; check the spec).
Skipping acclimation is the most common cause of cupping, gapping, and warping in the first six to twelve months. A floor that’s installed during the rainy season at 60 percent humidity and then dries to 40 percent during summer will gap. A floor installed at 40 percent humidity in January and then sees 65 percent during a coastal summer will cup. Acclimation lets the wood reach an equilibrium so it expands and contracts within tolerance.
LVP doesn’t require acclimation (one of its advantages). Tile also doesn’t.
Day 1 to 3: Demo
The visible start. Existing flooring comes up:
- Carpet and pad: pulls up quickly, usually 1 day for a typical home
- Floating laminate or LVP: also fast, 1 day
- Stapled hardwood or engineered: 1 to 2 days
- Glued vinyl or VCT: slow — adhesive removal can take 2 to 4 days for a whole-house
- Mortared tile: hardest — sometimes requires concrete grinding, 2 to 5 days
Furniture has been moved out (either to a storage unit or to a portion of the house not being worked on). Containment goes up where adjacent rooms need protection from dust. Debris goes into a dumpster outside.
By the end of the demo phase, the home is on subfloor. Any hidden conditions — soft spots, water damage, knob-and-tube wiring rising up through subfloor penetrations, asbestos in old mastic — are now visible.
For Bay Area homes built before 1985, asbestos testing of any old mastic or vinyl is sometimes required. If positive, professional abatement adds days and cost.
Day 4 to 6: Subfloor Prep
This is the phase that separates a quality install from a bargain one.
The subfloor gets inspected for:
- Flat tolerance — usually 3/16 inch deviation over 10 feet for hardwood, 1/4 inch over 10 feet for LVP. Out-of-tolerance areas get leveling compound.
- Soft spots — patched with new plywood, refastened to joists if loose
- Squeaks — refastened with deck screws (often through carpet pad before the underlayment goes on, easier to find squeaks while still walking on bare subfloor)
- Water damage — section-replaced if found
- Joist spacing and condition (for raised foundations) — if joists are sagging or undersized, sister joists may be needed before install
- Moisture content (for concrete slabs) — calcium chloride or relative humidity testing; if over manufacturer threshold, moisture mitigation primer applies
Subfloor leveling compound takes 24 to 48 hours to cure depending on product and conditions. The schedule has to account for this — install can’t start before cure is complete.
Day 7: Underlayment and Moisture Mitigation
Underlayment goes on:
- For hardwood (engineered or solid) being nailed down: 15-pound asphalt-saturated felt or a vapor-retarder paper
- For floating LVP or engineered: foam or felt underlayment with sound-dampening properties
- For glue-down installs: no underlayment, but the adhesive system serves a similar function
- For tile: cement-board substrate (Hardibacker or Durock) or anti-fracture membrane (Ditra), depending on the install
Moisture mitigation, if applicable, also happens in this window. Penetrating sealers or epoxy moisture barriers apply over the slab and cure for 24 hours before any further work.
Day 8 to 14: Installation
The main event. Installation rates vary by material:
- LVP click-lock: 300 to 500 square feet per crew per day
- Engineered hardwood floating: 250 to 400 square feet per day
- Engineered hardwood glue-down: 200 to 350 square feet per day
- Solid hardwood nail-down: 200 to 300 square feet per day
- Porcelain tile (standard format): 100 to 200 square feet per day
- Large-format tile or stone: 50 to 150 square feet per day
- Herringbone or chevron pattern hardwood: 100 to 200 square feet per day (slower than straight-lay)
For a 1,500-square-foot Bay Area home, plan on 4 to 8 days of installation for hardwood or LVP, longer for tile, longer still for patterned installs.
A good installer keeps the work area clean as they go and works in a logical pattern that doesn’t trap them in a corner. The visual quality of seams, the consistency of the field pattern, and the precision of cuts at walls and transitions are all visible signs of installer skill.
Day 15 to 16: Transitions, Baseboard, and Trim
After the field flooring is in, transitions get installed:
- Thresholds at room transitions (matching, T-molding, reducer, or flush as appropriate)
- Stair nosings if stairs are part of the project
- Quarter-round or shoe molding at the perimeter, hiding the expansion gap
- Baseboard replacement if needed (often the case if new floor height is meaningfully different from old)
These details are what make a flooring install look finished. A floor with crooked transitions, missing shoe molding, or unpainted baseboard reads as incomplete even if the field is perfect.
Day 17: Cleanup and Walkthrough
Final cleanup — debris removed, surface vacuumed and wiped, install area returned to livable condition. The contractor walks the floor with the homeowner, looking for any defects, missed cuts, or finish issues.
For site-finished hardwood, the finish cure phase begins now and runs another 3 to 7 days before furniture can go back on the floor.
After Move-Back-in: The First 30 Days
Furniture goes back in. Area rugs go down. For site-finished floors, give the finish another week before laying rugs (rugs on uncured finish can leave marks).
The first 30 days will reveal any acclimation issues — slight gapping during dry weeks, slight cupping during humid weeks. Minor seasonal movement is normal. Substantial cupping, gapping, or buckling indicates an install problem and should be flagged to the contractor under warranty.
How Top Tier Manages a Flooring Installation Timeline
Top Tier runs flooring projects against a clear day-by-day schedule. Material is ordered with realistic lead times built in, acclimation is scheduled with the homeowner so they know when the boxes will arrive, and subfloor prep is treated as a real phase — not a check-the-box step. Across hundreds of Bay Area flooring installs, the team has seen where shortcuts cause callbacks and where careful pacing pays off. Licensed under CA License #1146790, bonded and insured, with warranty support that takes seasonal movement into account.
Common Questions About Flooring Installation Timeline
Can a Flooring Install Be Done in a Weekend?
A single room with simple LVP over a flat subfloor, maybe. A whole-house install, no. Real prep, real acclimation, and real install time can’t be compressed into a weekend.
Why Do I Have to Wait Days for Subfloor Compound to Dry?
Self-leveling compound is essentially a pourable concrete. It takes 24 to 72 hours to reach the strength and dryness needed to bond with the next layer. Installing flooring on uncured compound traps moisture and causes failures.
Can I Walk on a Newly Installed Floor Right Away?
For LVP and pre-finished hardwood, yes — immediately after install. For site-finished hardwood, no — the finish needs to cure. Walking sock-foot is usually fine after 24 hours; shoes after 48 to 72; furniture after 72 to 168 depending on finish type.
What’s the Most Common Cause of Timeline Slips?
Material lead time delays (hardwood arriving late), subfloor surprises during demo (water damage, asbestos), and homeowner indecision on selections that pushes the order date. A pre-construction phase that locks selections and confirms delivery dates protects the schedule.
Bottom Line
A Bay Area flooring install takes the time it takes — each step has a real purpose, and rushing the substrate or skipping acclimation is the cause of most floors that fail prematurely. A clear day-by-day schedule shared up front lets the homeowner plan around it confidently.
If you’re planning a Bay Area flooring project and want to think through the schedule, Top Tier is happy to walk through what your specific project would actually look like week by week.
By Top Tier Building Services Inc.
Licensed Bay Area General Contractor License #1146790 serving homeowners, HOAs, and property managers from Castro Valley. Top Tier delivers design-build, renovation, and maintenance services across 14 specialty trades.