
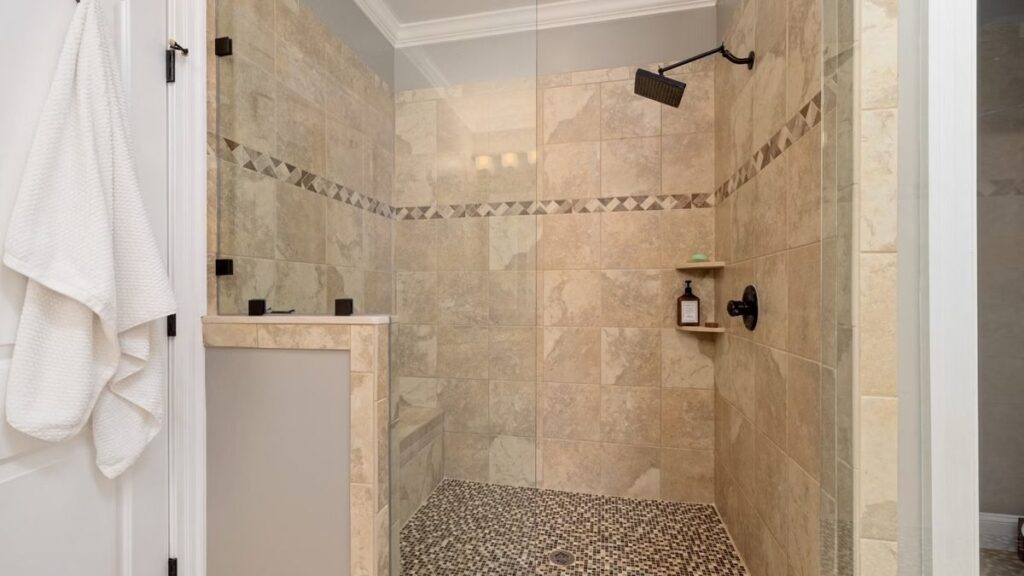
A bead that splits down the middle four months after you laid it almost never failed because of the tube you bought. It failed because it was asked to do a job it was never built for. Most homeowners approach how to caulk a shower as patching — find the gap, fill the gap, walk away — and that framing is the entire problem.
Caulk is a movement joint — the deliberately flexible part of a rigid assembly, placed where two surfaces move against each other, and its whole value is that it stretches. Every rule below falls out of that one idea, including why “just recaulk it” is sometimes the wrong answer entirely.
Key Takeaways
- Caulk fills movement joints, not gaps. Every change of plane in a shower moves. Every flat field of tile does not.
- Silicone does not bond to cured silicone. The old bead comes out to clean, dry substrate — all of it, not just the loose parts.
- Use 100% silicone inside a wet enclosure. Siliconized acrylic paints beautifully and fails early anywhere water stands.
- A joint wider than roughly a quarter inch needs closed-cell backer rod, not a fatter bead. Bead depth should match the joint width up to about half an inch, with a quarter inch as the practical minimum — depth drops to half the width only on wider joints.
- Water-ready and fully cured are different numbers, and the spread between products is large. GE rates its Supreme Silicone Kitchen & Bath water-ready in 30 minutes but asks 12 hours on its Tub & Tile Silicone 1 — both 100% silicone. Read the cartridge, not a rule of thumb.
- A bead that keeps splitting, or a corner that regrows mold within weeks, is a waterproofing failure showing through the caulk. Recaulking will not fix it.
What This Guide Covers
- Why Caulk Is a Movement Joint and Not a Sealant Patch
- Where Silicone Belongs and Where Grout Takes Over
- Choosing Between 100% Silicone and the Cheaper Alternatives
- How to Caulk a Shower Step by Step
- How to Caulk a Large Gap in a Shower Without a Fatter Bead
- Caulking a Shower Door, a Pan and the Inside Corners
- When Recaulking Is the Wrong Fix for a Leaking Shower
- Ready to Stop Recaulking the Same Failing Joint
- FAQs
Why Caulk Is a Movement Joint and Not a Sealant Patch
A tiled shower is not one object. It is tile bonded to thinset, bonded to a waterproofed backer board, screwed to wood framing that shrinks, swells and deflects. Those layers expand at different rates every time the room goes from cold and dry to hot and saturated, twice a day, for decades.
The construction answer to that is a movement joint — a deliberate soft break so the assembly can move without cracking itself apart. The Tile Council of North America publishes placement guidance as Detail EJ171 in the TCNA Handbook, and its own FAQ is candid that exact locations and spacing depend on site conditions. It also notes that interior installations need joints more frequently where moisture or direct sunlight is expected. A shower is the most moisture-loaded interior surface in the house.
What goes into those joints is equally specified. TCNA describes movement joints as filled with a material that allows contraction and expansion, naming silicone for locations where traffic is not a concern and calling for a sealant of Shore hardness 35 or greater where traffic is. The cartridge itself is a tested product, not generic goo: ASTM C920, Standard Specification for Elastomeric Joint Sealants, is the specification most quality shower silicones are certified to.
So the bead is a designed component with a rated movement capability. A bead that tore was bonded on three sides so it could not stretch, laid too thick to flex, laid over a surface it could never grip, or asked to bridge a gap beyond its rating.
Where Silicone Belongs and Where Grout Takes Over
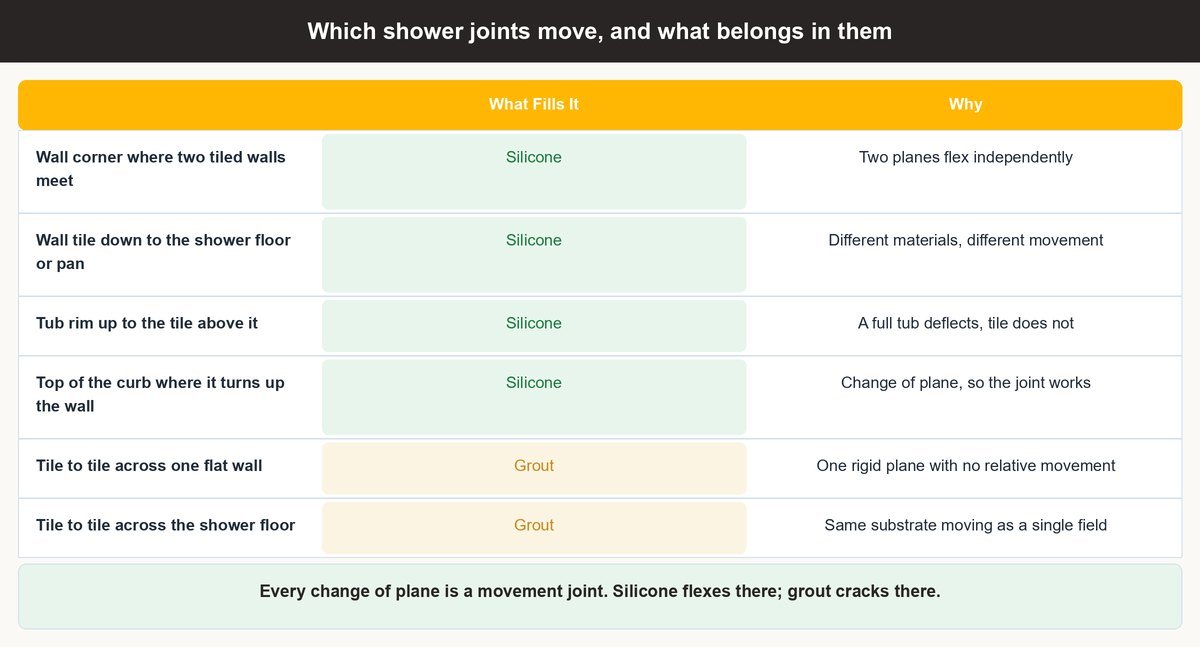
The dividing line is simple enough to apply with your eyes. Anywhere the surface changes direction or changes material, the joint moves, and it gets silicone. Anywhere tile sits next to tile on one continuous plane, the joint is static, and it gets grout.
So the inside corners where two tiled walls meet, the line where wall tile lands on the shower floor or pan, the seam where a tub rim meets the tile above it, and the top of the curb where it turns up the wall are all silicone. The tile-to-tile seams in between are grout.
Choosing Between 100% Silicone and the Cheaper Alternatives
The tube marked “kitchen and bath” at the front of the aisle is frequently siliconized acrylic latex — a paintable, water-cleanup caulk with a little silicone blended in. It tools beautifully and it does not belong inside a shower enclosure.
Two details on the label are worth more than the brand name. First, look for a stated ASTM C920 classification, which tells you the sealant has been tested for movement capability rather than just marketed for bathrooms. Second, on a floor or curb joint that gets walked on, TCNA’s Shore 35 minimum is the number that separates a sealant that holds an edge from one that dents under a heel.
How to Caulk a Shower Step by Step
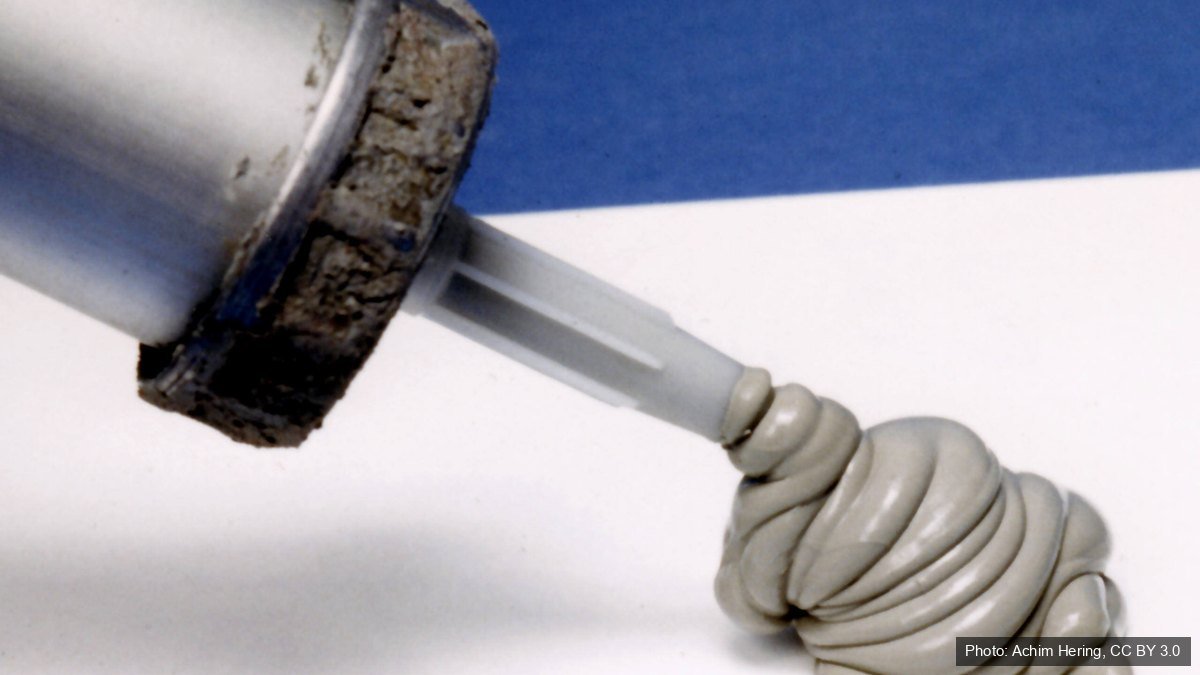
The whole job is roughly two hours of work spread across two days, and almost all of the skill sits in the first step. Nothing you do later compensates for a joint that was not fully stripped and fully dry.
Strip the Old Bead Back to Bare Substrate
Cut Both Faces First
Score along both edges of the bead with a fresh utility blade or a purpose-made caulk removal tool, then pull the strip out in one piece where you can. Follow with a plastic scraper and a solvent-dampened rag until nothing tacky remains. Fresh silicone will not bond to cured silicone, so any residue you leave becomes a deliberate delamination line.
Let the Joint Dry Longer Than You Think
Give It a Full Day
A joint that looks dry on the surface can still hold water in the grout and behind the tile edge, and silicone applied onto damp substrate loses adhesion within weeks. Stop using the shower, run the exhaust fan, and give it at least 24 hours. A hair dryer on low along the joint shortens that, but does not replace it.
Cut the Nozzle to Match the Joint Width
Start Small and Open Up
Cut the nozzle at roughly a 45-degree angle, narrower than you think the joint needs, and test the bead on cardboard. You can always enlarge the opening and you cannot shrink it. An oversized nozzle is why beads end up smeared three tiles wide and sitting proud of the corner.
Lay One Continuous Pass and Tool It Immediately
Push the Bead Ahead
Push the gun along the joint rather than dragging it, which forces material in instead of skimming it across the surface, and keep a steady pace without stopping mid-run. Tool it within about ten minutes, before a skin forms, using a rounded tool or a wet fingertip to press the bead into contact with both faces.
Decide Whether Tape Earns Its Place
Skip the Tape on Corners
Learning how to caulk a shower without tape is mostly a matter of a well-cut nozzle and a steady hand, and on inside corners tape is often a net loss — it is slow to place, it lifts in a wet room, and pulling it leaves a ridge you then have to re-tool. Tape earns its keep on long straight runs against glass, stone or a painted wall.
Respect the Cure Before the First Shower
Read the Cartridge Not the Forum
Cure time is a product property, not a rule of thumb, and two sealants from one maker can differ by a factor of twenty-four. GE tells you to allow 12 hours before exposing the sealant to water on its Tub & Tile Silicone 1, while its Supreme Silicone Kitchen & Bath is rated water-ready in 30 minutes. GE puts full cure at 24 hours and warns that thicker beads, cold rooms and dry air all slow it down. Wait past the minimum and keep the fan running.
How to Caulk a Large Gap in a Shower Without a Fatter Bead
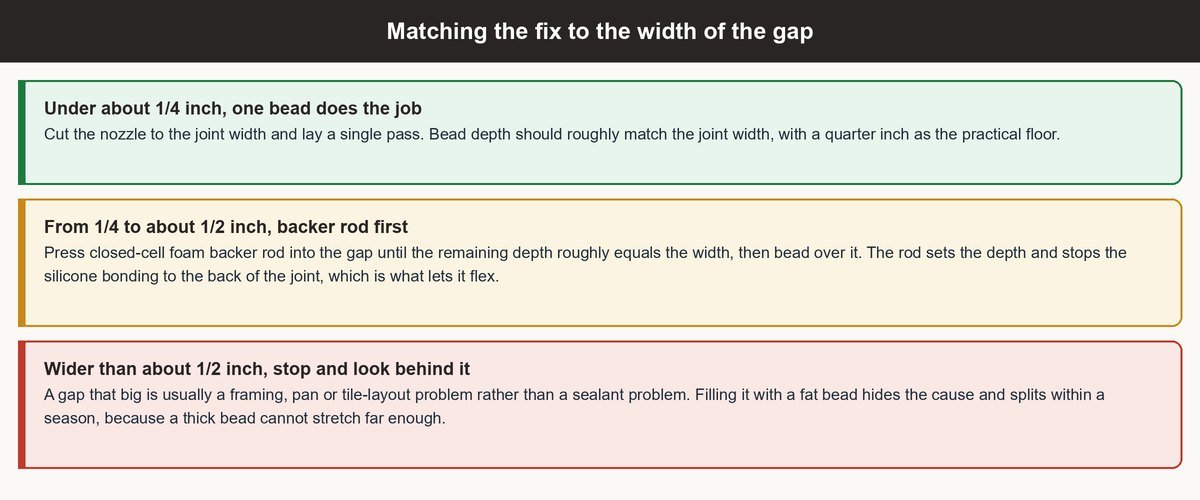
The instinct with a wide joint is to cut the nozzle bigger and pump in more material. That instinct is exactly backwards, and it is why wide beads split down the center while narrow ones alongside them survive.
A sealant stretches as a percentage of its own dimensions, and it stretches best bonded to two opposing faces and free in the middle — the classic hourglass profile. Fill a deep joint solid and you have bonded it on three sides, so movement a thin bead would have absorbed tears it instead, straight down the middle where it is thickest.
Closed-cell foam backer rod solves both problems at once. Press a rod slightly wider than the gap into the joint until the remaining depth roughly equals the joint width, and no less than a quarter inch, then bead over it. The rod sets the depth, prevents the third bond, and gives the silicone a firm surface to tool against.
Past roughly half an inch, stop and ask what created that gap. A shower door frame standing off the tile, a pan flange that never sat flat, a tile course that ran out of room — those are assembly problems, and a fat bead only hides them until it fails.
Caulking a Shower Door, a Pan and the Inside Corners
Three of the most-searched shower joints each behave differently, and the differences are not cosmetic.
Sealing a Shower Door Without Trapping Water
Seal the Outside Only
Frame a shower door and you seal the outside of the bottom track and the outside vertical edges where the frame meets tile, leaving the inside of the track unsealed so any water that gets past the seals can drain back into the pan. Sealing the inside face turns the track into a reservoir that stays wet permanently. Leave the designed weep points clear.
Handling the Shower Floor Perimeter
Where Wall Meets Floor Tile
The joint where wall tile lands on the shower floor is a change of plane, so it is silicone, not grout, all the way around including the corners. Clean it out fully, dry it, and run one continuous bead rather than patching the visibly failed foot. The joint that failed first is only the joint that got wet first.
Sealing a Prefab Shower Pan Differently
Seal the Flange Not the Face
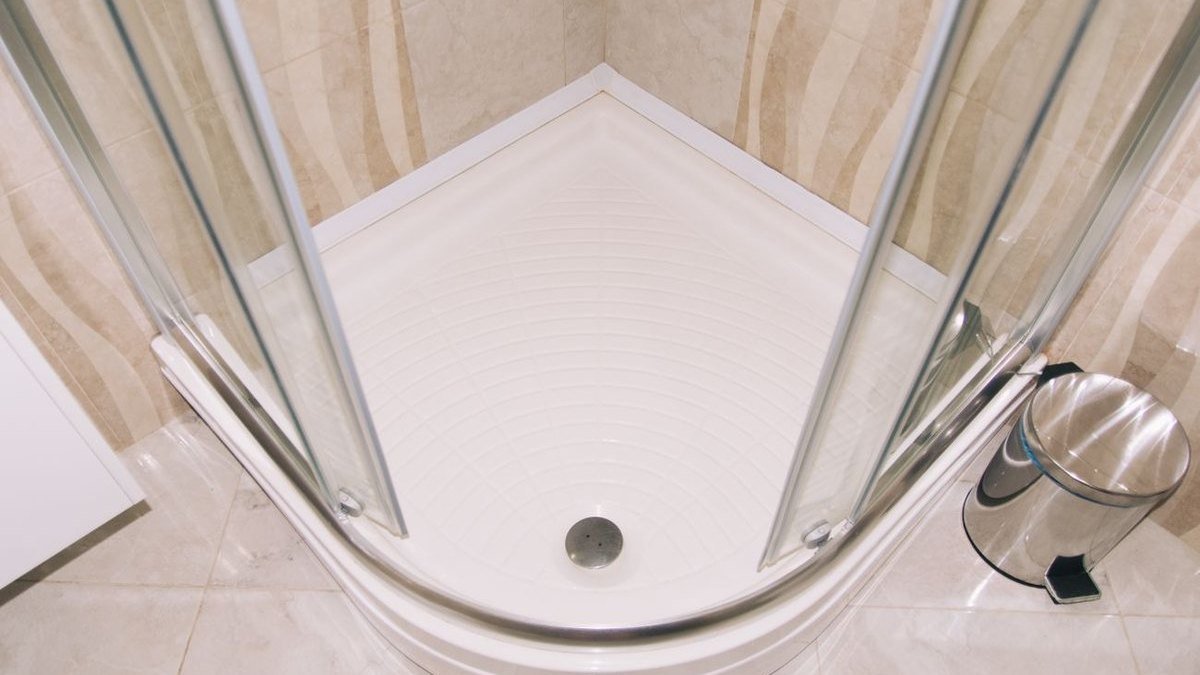
An acrylic or fiberglass shower pan is a separate component that flexes independently of the tile, so the caulk line where its lip meets the wall surface carries real movement and should never be grouted. If the pan itself feels springy underfoot, sealing the perimeter is treating a symptom — the setting bed beneath it is the actual fault, which is where a properly built shower floor starts.
When Recaulking Is the Wrong Fix for a Leaking Shower
Caulk is a surface joint, not the waterproofing. In a correctly built shower the waterproofing layer lives behind the tile, and the bead in the corner keeps splash water out of a moving seam rather than stopping a leak.
So when the same joint fails repeatedly, the bead is reporting a problem rather than causing one. A bead that splits within months usually means real structural movement — a flexing floor, an unsupported pan, or a joint too wide for its rating. Black growth returning within weeks of a fresh, mildew-resistant bead means the substrate behind it is staying wet. A soft or hollow-sounding spot in the wall below the joint means water has been getting past for a long time.
The EPA’s household mold cleanup guidance is direct on the principle: fix plumbing leaks and other water problems as soon as possible and dry everything completely. Cleaning without controlling the moisture only buys time, which is why ventilation matters as much as the bead.
At Top Tier Building Services (CSLB #1146790), the first thing our crews do on a repeat-failure shower is open a small area rather than sell another bead, because the honest options diverge sharply at that point. Sometimes it is a repair. Sometimes the enclosure has to come out and go back with a modern waterproofing membrane — a scope we walk through in our guide to tiling a shower the right way, and a decision worth testing against the questions we tell homeowners to ask before they hire anyone.
Ready to Stop Recaulking the Same Failing Joint
If you have stripped and resealed the same corner more than once, the caulk is not the problem — something behind it is moving or staying wet, and a seventh bead will fail like the previous six. Our crews handle shower repairs, waterproofing rebuilds and full bathroom remodels across Alameda, Contra Costa and Santa Clara counties, and we will tell you plainly when a joint is a two-hour fix and when it is not. Contact us for a look at what is actually going on behind that bead.
FAQs
How do you caulk a shower corner so it stops cracking?
Treat it as one continuous joint, not three patches. Strip the old bead from all three planes, dry it fully, and run silicone down the corner in a single pass. Corner cracks almost always come from grout in the joint, a bead bonded on three sides, or real movement behind the tile.
How do you caulk where a shower and tub meet?
Fill the tub with water before you caulk and leave it full until the silicone has skinned. A full tub deflects under the weight, opening the joint to its widest position. It matters most on acrylic and fiberglass tubs, which flex noticeably; a cast-iron tub on a slab barely moves. Sealing at the joint’s widest means the cured bead gets compressed rather than stretched in use, and silicone handles compression better than tension.
How long before you can use the shower after caulking?
It depends entirely on the product. GE rates its Supreme Silicone Kitchen & Bath water-ready in 30 minutes but instructs 12 hours on its Tub & Tile Silicone 1, and both are 100% silicone. Full cure runs about 24 hours, longer on a deep bead or in a cold, dry room. Showering early is the most common cause of a bead that peels within weeks.
Can you caulk over old caulk in a shower?
No. Cured silicone is a release surface, so fresh silicone laid on top is held only at the edges and peels off in a strip. Even with acrylic caulks, recaulking over the old bead traps whatever moisture and mold sits underneath. Remove it completely.
How do you clean caulk in a shower without wrecking it?
Use a soft brush with a bathroom cleaner or a diluted bleach solution, let it dwell rather than scrubbing hard, and rinse well. Abrasive pads scratch silicone and give mold more surface to hold. If the discoloration sits inside the bead rather than on it, cleaning will not lift it.
Do you caulk a shower before or after grouting?
After. Grout the field joints first, let them cure, then clean out the change-of-plane joints and caulk them. Grouting afterwards smears grout across a soft bead you cannot then clean, and grout landing in the movement joint defeats the point of having one.